My husband is the KING of what we in Texas call “Aggie Engineering”. In other words, he loves to remake and redo things in order to save money. (Sometimes that’s actually a good thing). His latest project involved remaking an old, unused, little electric smoker that had been sitting out in our shed for probably 10 years or so. He was about to put it out at the curb, so he could purchase a new fancy-schmancy wood fired smoker, when his brain lit up, and that little, cheap lightbulb went off! Ding ding ding!!! He decided to retro fit that little old smoker himself. No fancy- schmancy needed here! No sirree! He found some directions online, (which I have since searched for and can’t find) and was able to make a perfectly fine, perfectly sized, little smoker, just fit for two! I have to say. It’s been AWESOME! No need to heat up my kitchen in this Texas heat! Yay! This Sunday, he smoked a brisket, and I just have to share his rub recipe.
2 T. Sugar
2 T. Kosher Salt
3 tsp. brown sugar
2 tsp. smoked paprika
1 tsp. chili powder
1 tsp. fresh chopped oregano
1 tsp. ground cumin
1/2 tsp. garlic powder
1/4 tsp. cayenne pepper
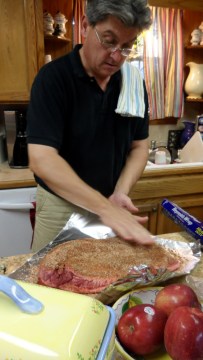
On Saturday night, he sprinkled the rub onto the brisket and rubbed it in realllllly good. He wrapped it up in foil and it stayed in the fridge all night. Gettin’ all spicy and stuff…
Then on Sunday, out to the smoker it went. Daisy supervised. She’s good like that.

He placed it on our little bitty smoker.

Daisy watched. She takes this smokin’ business very seriously. She is hugging that little bit of shade by the fence! Poor baby…so hot right now. Ugh…

He had been soaking some apple wood chips for hours, and that’s what he placed onto the already hot fire, to create the smoke. He just checked on the smoker periodically, placing new chips onto the fire. That smoke is the key to great barbecue!
Sliced up and ready to devour. It was so tender and juicy and ridiculously good. I swear. It just made me Texas barbecue proud! Yum-yum!
I served it with a “semi-homemade” pasta salad. I just made a boxed pasta salad mix, and whisked in one generous tablespoon of prepared Basil Pesto to the dressing. I added the last of my fresh Roma tomatoes (sigh) and some mozzarella cheese, black olives, thinly sliced red olives and fresh basil. I let that hang out in the fridge all day, and it was ready to enjoy by supper time.
Enjoy! Take time to smell the brisket…


